VOIDKAT
Google Vision API with Node.js
March 03, 2019
Google Vision API features several facial and landmark detection features. In this post I will record how I went about utilizing this API with node.js.
The platform has great guides to getting started with using the Vision API along with node.js. However nothing succinctly puts all the information together which is the purpose of this post.
This API has a free trail however this still requires an account with Google APIs as well as credit card information.
Getting API cridentials
Create your account on at Google Vision API page, create a Google Cloud Platform project, enable billing, and enable the API and finally create your service account key. By this stage you will create a authentication JSON file you will use to authenticate your account when calling Google Vision API.
Setting up
Let’s create the project now. Run:
mkdir vision-api && cd vision-api && npm init
Download the JSON authentication file. Place it in a directory with in the project directory
mkdir auth
Create a test file.
touch index.js
Install the google cloud
npm install @google-cloud/vision --save
Authentication setup
Within index.js, let’s require in the vision npm package and our authentication json file.
const vision = require('@google-cloud/vision')
const credentials = require('./auth/creds.json')
Create the client and pass in the authentication as a parameter.
const client = new vision.ImageAnnotatorClient({
credentials
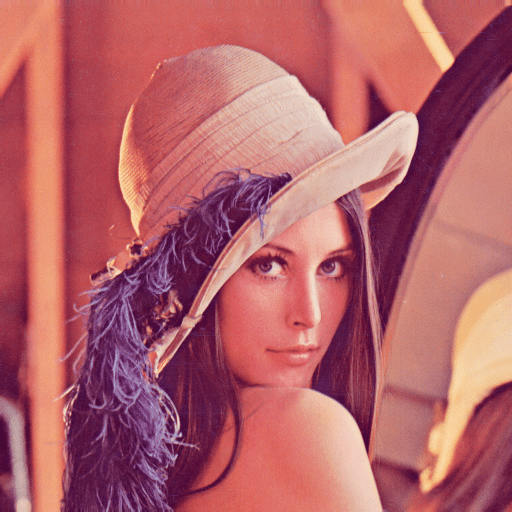
});Let’s create a directory and grab a sample image. We will be using Lenna image.
mkdir images
Loading the image
Let’s read our image from the local file system, we will use `fs.
const fs = require('fs');
Load the image into a variable
var imageFile = fs.readFileSync('images/lenna.png');
We will be passing the image as a Base64 string.
var encoded = Buffer.from(imageFile).toString('base64');
Form annotation request
We will now create the request to the API as as JSON object.
const request = {
    "image": {
        "content": encoded
    },
    "features": [
        {
            "type": "FACE_DETECTION"
        },
        {
            "type": "LABEL_DETECTION"
        },
        {
            "type": "IMAGE_PROPERTIES"
        },
        {
            "type": "WEB_DETECTION"
        }
    ],
};
Facial features, image properties, web detection and label detection
In the image section we specify that we are passing a base64 image by calling content. Then we define what features we want to detect.
FACE_DETECTION will do facial detection and simplified emotion detection.
LABEL_DETECTION will try to label parts of the image.
IMAGE_PROPERTIES will define dominate colors in the image.
WEB_DETECTION will try to find similar images as the one passed.
Calling the API
Now let’s create the function to call the API itself. We will async/await to call the api via the client with our request.
client.annotateImage(request)Below is the whole function call.
callAnnotateImage = async () => {
   try {
        const call = await client.annotateImage(request);
        console.log(call);
    } catch (error) {
        console.error(error);
    }
}

callAnnotateImage()
Complete code
The following is the full code to then call to get results
const vision = require('@google-cloud/vision');
const credentials = require('./auth/creds.json');
const fs = require('fs');

const client = new vision.ImageAnnotatorClient({
    credentials
});

callAnnotateImage = async () => {
    var imageFile = fs.readFileSync('images/lenna.png');
    var encoded = Buffer.from(imageFile).toString('base64');

    const request = {
        "image": {
            "content": encoded
        },
        "features": [
            {
                "type": "FACE_DETECTION"
            },
            {
                "type": "LABEL_DETECTION"
            },
            {
                "type": "IMAGE_PROPERTIES"
            },
            {
                "type": "WEB_DETECTION"
            }
        ],
    };

    try {
        const call = await client.annotateImage(request);
        console.log(call);
    } catch (error) {
        console.error(error);
    }
}
callAnnotateImage()
Results
Here is a gist link to the raw output that will be created. One note is that the result for facial detection will always be an array as any image could have multiple faces.
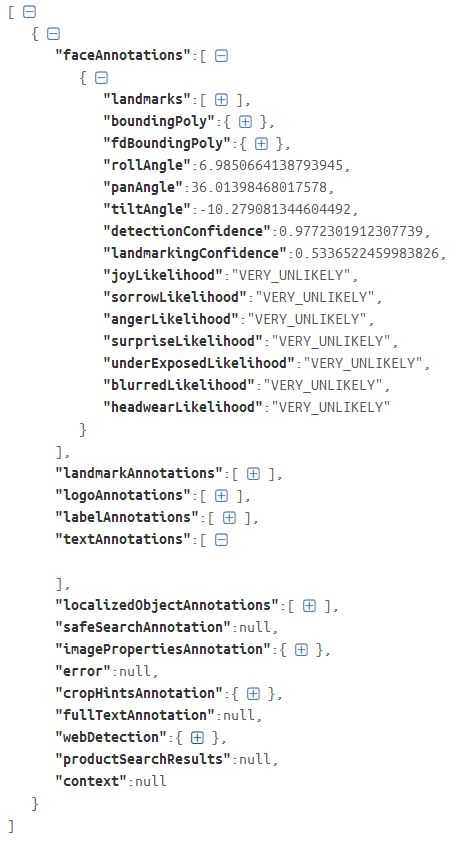
Face Detection
Face detection will show where various facial features are location with x/y positions on the image.
{
    "type": "LEFT_EYE",
    "position": {
        "x": 267.9632568359375,
        "y": 267.1448974609375,
        "z": -0.0016142273088917136
    }
},
It will also return basic emotional states:
"joyLikelihood": "VERY_UNLIKELY",
"sorrowLikelihood": "VERY_UNLIKELY",
"angerLikelihood": "VERY_UNLIKELY",
"surpriseLikelihood": "VERY_UNLIKELY",
"underExposedLikelihood": "VERY_UNLIKELY",
"blurredLikelihood": "VERY_UNLIKELY",
"headwearLikelihood": "VERY_UNLIKELY"
Label detection
Labels will be return for the image with a confidence score.
{
    "locations": [],
    "properties": [],
    "mid": "/m/03q69",
    "locale": "",
    "description": "Hair",
    "score": 0.964884340763092,
    "confidence": 0,
    "topicality": 0.964884340763092,
    "boundingPoly": null
},
Image properties
These will be dominat colors found in the image, with a dominance score:
{
    "color": {
        "red": 97,
        "green": 25,
        "blue": 58,
        "alpha": null
},
    "score": 0.38272565603256226,
    "pixelFraction": 0.09201095253229141
},
Web detection
Web detection can detect entity labels for the image. For example here it detects the model found in the image e.g.
{
"entityId": "/m/056khl",
"score": 10.749000549316406,
"description": "Lena Söderberg"
},
As well as matching images
{
"url": "https://i.stack.imgur.com/lSSe2.png",
"score": 0
},
and pages where a matching image is found:
{
    "fullMatchingImages": [
    {
        "url": "https://assets.bwbx.io/images/users/iqjWHBFdfxIU/i3kYigV09A4g/v3/1000x-1.jpg",
        "score": 0
    }
    ],
    "partialMatchingImages": [],
    "url": "https://www.bloomberg.com/news/features/2018-02-01/women-once-ruled-computers-when-did-the-valley-become-brotopia",
    "score": 0,
    "pageTitle": "Women Once Ruled Computers. When Did the Valley Become ..."
},
and so on.
Conclusion
Hope this has helped you in some way! I for sure will now be able to reference this for myself.

Written by Farhad Agzamov who lives and works in London building things. You can follow him on Twitter and check out his github here